MANUAL DE INSTRUCCIONES TELÉFONO CELULAR C/TV Y TRIPE ...€¦ · MANUAL DE INSTRUCCIONES...
51
MANUAL DE INSTRUCCIONES TELÉFONO CELULAR C/TV Y TRIPE TARJETA SIM CEL-4343TV ESTIMADO CLIENTE Con el fin de que obtenga el mayor desempeño de su producto, por favor lea este manual de instrucciones cuidadosamente antes de comenzar a utilizarlo, y guárdelo para su futura referencia. Si necesita soporte adicional, no dude en escribir a: [email protected]
Transcript of MANUAL DE INSTRUCCIONES TELÉFONO CELULAR C/TV Y TRIPE ...€¦ · MANUAL DE INSTRUCCIONES...

MANUAL DE INSTRUCCIONES TELÉFONO CELULAR C/TV Y
TRIPE TARJETA SIM CEL-4343TV
ESTIMADO CLIENTE Con el fin de que obtenga el mayor desempeño de su producto, por favor lea este manual de instrucciones cuidadosamente antes de comenzar a utilizarlo, y guárdelo para su futura referencia. Si necesita soporte adicional, no dude en escribir a: [email protected]

P-1
PRECAUCIÓN
RIESGO DE CHOQUE
ELÉCTRICO , NO ABRA
Precaución: Para reducir el riesgo de choque eléctrico, no retire la cubierta, no hay partes manipulables por el usuario al interior de la unidad. Refiera todo mantenimiento o intervención técnica a personal técnico calificado.
Este símbolo indica la existencia de voltaje peligroso al interior de esta unidad, que constituye un riesgo de choque eléctrico.
Este símbolo indica que hay importantes instrucciones de operación y mantenimiento en la literatura que acompaña a esta unidad.
LÍNEAS DE SERVICIO AL CLIENTE PREMIER Venezuela: 0800 – ELECTRIC (353-2874) Colombia: 01-900-331-PEJC (7352) Panamá: 300-5185 Sitio Web: www.premiermundo.com E-mail: [email protected] NOTA Nos reservamos el derecho de modificar las especificaciones, características y/u operación de esta unidad sin previo aviso, con el fin de continuar las mejoras y desarrollo del mismo.
P-2
ÍNDICE INSTRUCCIONES DE SEGURIDAD.........................................................................................................4�INFORMACIÓN DE LA UNIDAD ..............................................................................................................5�
ICONOS .................................................................................................................................................5�INSTALAR TARJETA SIM Y BATERÍA..................................................................................................6�INSTALAR LA TARJETA DE ALMACENAMIENTO...............................................................................6�CARGA DE LA BATERÍA.......................................................................................................................6�ENCENDER APAGAR LA UNIDAD .......................................................................................................6�USO DE LOS BOTONES DE ACCESO DIRECTO................................................................................7�
FUNCIÓN DE LLAMADAS .......................................................................................................................7�HACER UNA LLAMADA: .......................................................................................................................7�RESPONDER O RECHAZAR UNA LLAMADA......................................................................................7�AJUSTAR EL VOLUMEN DE LLAMADAS.............................................................................................7�FINALIZAR UNA LLAMADA...................................................................................................................7�
REGISTRO DE LLAMADAS .....................................................................................................................7�LLAMADAS REALIZADAS.....................................................................................................................8�LLAMADAS RECIBIDAS........................................................................................................................8�LLAMADAS PERDIDAS.........................................................................................................................8�LLAMADAS RECHAZADAS...................................................................................................................8�BORRAR TODO ....................................................................................................................................8�HORA DE LLAMADAS...........................................................................................................................8�COSTO DE LLAMADA (ES NECESARIO UN SOPORTE DE RED)......................................................8�VOLUMEN GPRS ..................................................................................................................................8�
PERFILES DE USUARIO..........................................................................................................................8�ESTÁNDAR............................................................................................................................................8�SILENCIO ..............................................................................................................................................8�VIBRADOR ............................................................................................................................................8�SONIDO BAJO.......................................................................................................................................8�SONIDO ALTO Y VIBRADOR................................................................................................................9�
CONTACTOS ............................................................................................................................................9�VISUALIZAR UN CONTACTO ...............................................................................................................9�AGREGAR UN NUEVO CONTACTO ....................................................................................................9�
MENSAJE .................................................................................................................................................9�ESCRIBIR UN MENSAJE ......................................................................................................................9�BANDEJA DE ENTRADA.......................................................................................................................9�BUZÓN DE SALIDA...............................................................................................................................9�PROYECTOS.........................................................................................................................................9�ENVIADOS.............................................................................................................................................9�AJUSTE DE MENSAJES .....................................................................................................................10�PLANTILLAS........................................................................................................................................10�BUZÓN DE VOZ ..................................................................................................................................10�TRANSMISIÓN DE MENSAJES ..........................................................................................................10�AJUSTE DE MENSAJES SMS ............................................................................................................10�AJUSTE DE MENSAJES MMS............................................................................................................10�CAPACIDAD DE MENSAJE ................................................................................................................11�

P-3
INTERNET...............................................................................................................................................11�ENTRADA URL....................................................................................................................................11�PAGINA DE INICIO..............................................................................................................................11�FAVORITOS ........................................................................................................................................11�HISTORIAL ..........................................................................................................................................12�OFFLINE (SIN CONEXIÓN).................................................................................................................12�AJUSTES WAP....................................................................................................................................12�ALMACENAMIENTO PREFERIDO:.....................................................................................................12�AJUSTES GPRS..................................................................................................................................12�RESTAURAR VALORES PREDETERMINADOS ................................................................................12�
MULTIMEDIA ..........................................................................................................................................12�CÁMARA..............................................................................................................................................12�GRABADORA DE VIDEO ....................................................................................................................12�TV MÓVIL ............................................................................................................................................12�REPRODUCTOR DE AUDIO...............................................................................................................13�REPRODUCTOR DE MÚSICA DE FONDO ........................................................................................13�REPRODUCTOR DE VIDEO ...............................................................................................................13�NAVEGACIÓN DE IMÁGENES ...........................................................................................................13�GRABACIÓN........................................................................................................................................13�RADIO FM............................................................................................................................................13�ADMINISTRADOR DE ARCHIVOS......................................................................................................14�
HERRAMIENTAS....................................................................................................................................14�ALARMA ..............................................................................................................................................14�CALENDARIO......................................................................................................................................14�CALCULADORA ..................................................................................................................................14�BLUETOOTH .......................................................................................................................................14�LECTOR E-BOOK................................................................................................................................14�
APLICACIONES......................................................................................................................................15�SOKOBAN ...........................................................................................................................................15�
AJUSTES ................................................................................................................................................15�AJUSTES DE LLAMADA .....................................................................................................................15�AJUSTE DE TELÉFONO .....................................................................................................................17�AJUSTES DE PANTALLA....................................................................................................................17�AJUSTES DE SEGURIDAD.................................................................................................................18�RESTAURAR LA CONFIGURACIÓN ..................................................................................................19�
PRECAUCIONES DE SEGURIDAD........................................................................................................19�USO DEL TELÉFONO .........................................................................................................................19�DISPOSITIVOS MÉDICOS ..................................................................................................................20�PRECAUCIONES AL CARGAR LA BATERÍA DEL TELÉFONO .........................................................20�PRECAUCIONES AL USAR LA BATERÍA...........................................................................................21�PRECAUCIÓN EN EL USO DE PIEZAS DE REPUESTO...................................................................21�OTRA INFORMACIÓN DE SEGURIDAD.............................................................................................22�
P-4
INSTRUCCIONES DE SEGURIDAD
Si va a contestar una llamada, use los audífonos o parquee su vehículo.
Asegúrese que la unidad se encuentra apagada o en modo de vuelo mientras esta en un avión, ya que la señal del teléfono puede interferir con la red de comunicación del avión.
Recuerde que cualquier equipo inalámbrico esta sujeto a interferencias, lo cual puede afectar su funcionamiento normal.
Apague su celular cerca de dispositivos médicos o en lugares en donde el uso del teléfono no esta permitido
No use accesorios que no sean compatibles con la unidad ya que estos puede causar daños. Use siempre accesorios originales
Para evitar el riesgo de explosión apague la unidad en estaciones de servicio y lugares donde haya combustible, químicos u otras substancias peligrosas.
Con el fin de evitar explosiones, apague la unidad en los lugares que se indique. Preste atención y obedezca las reglas y regulaciones del área.
No queme la batería de la unidad ni la deposite en un recipiente de basuras ordinarias ya que esto puede dañar el medio ambiente. Siga las normas de su localidad sobre el deposito de desechos.
Si necesita conectar la unidad a otros dispositivos, lea cuidadosamente el manual de usuario del dispositivo por seguridad.
Mantenga las partes pequeñas de la unidad (Como tarjeta SIM) fuera del alcance de los niños.
Almacene información importante en discos duros, con el fin de evitar perdida de información.
���
Asegúrese que el teléfono esta encendido y dentro del rango de cobertura antes de realizar una llamada de emergencia.

P-5
INFORMACIÓN DE LA UNIDAD ICONOS
Modo de Avión
Carga de la batería.
Mensaje MMS no leído
Memoria MMS llena
Descargando MMS
Modo de audífonos ó manos libres
Mensaje SMS no leído
Memoria SMS llena
Reloj ha sido ajustado
Función bluetooth activada
El perfil ha sido ajustado en modo de silencio
El perfil ha sido ajustado en modo de sonido bajo
El perfil ha sido ajustado en modo de sonido alto y modo de vibrador
El perfil ha sido ajustado en modo de vibrador
Representa la señal de red de SIM1, SIM2 y SIM3. La cantidad de barras significa la fuerza de la señal.
P-6
INSTALAR TARJETA SIM Y BATERÍA 1. Presione y sostenga la tecla “END” por tres segundos. 2. Deslice la cubierta de las baterías hacia abajo y retírela. 3. Remueva la batería. 4. Siga la señal en el celular para la instalación de SIM1, SIM2 y SIM3. Asegúrese de insertar la tarjeta
correctamente. 5. Coloque la batería y asegúrese que el lado dorado quede fijado con la pieza de contacto de la
unidad. Coloque la cubierta al finalizar. INSTALAR LA TARJETA DE ALMACENAMIENTO 1. Presione y sostenga la tecla “END” por tres segundos, hasta que la unidad se apague. 2. Remueva la cubierta de la batería. 3. Siga la dirección de las flechas de OPEN (Abrir) en la cubierta de la ranura T-Card (Tarjeta T), abra
esta cubierta y coloque la tarjeta en posición vertical y hacia arriba hasta que esta quede fija en el compartimiento.
4. Siga la dirección de las flechas “LOCK” (Bloqueo) en la cubierta de la ranura T-Card, tire la cubierta para bloquear la ranura.
CARGA DE LA BATERÍA Cargador de viaje 1. Instale la batería correctamente en la unidad. 2. Inserte el conector del cargador en la ranura de la unidad y luego conecte el enchufe del cargador a
un tomacorriente. Cuando la carga se ha completado, desconecte el cargador del tomacorriente primero, y luego retire el cargador de la unidad. Precaución 1. Use una batería aprobada y un cargador diseñado para esta unidad, de otra manera se puede
producir una explosión. 2. Si la batería de la unidad se encuentra completamente descargada, el icono de carga aparecerá en
la pantalla después de dos o tres minutos de carga. El tiempo de carga es de 2-5 horas aproximadamente, dependiendo del estado actual de carga de la unidad.
3. Trate de usar siempre el cargador para cargar la unidad, evite cargarla vía USB. 4. Para un mejor rendimiento de la batería, cargue y descargue la batería al menos 3 veces. La carga
inicial de la batería de la unidad debe ser de al menos 10 horas. ENCENDER APAGAR LA UNIDAD Encender: Presione y sostenga el botón “END” por tres segundos para encender la unidad. Apagar: Presione y sostenga el botón “END” por tres segundos para apagar la unidad. Advertencia: No encienda la unidad en lugares donde no este permitido el uso de aparatos inalámbricos, y asegúrese que no tenga activada la función de Auto encendido/apagado.

P-7
USO DE LOS BOTONES DE ACCESO DIRECTO Presione algunos botones en la pantalla de inicio para acceder directamente a las funciones de la unidad.
Botón Operación Función Botón 1/3 Presione brevemente Ingresa al historial de llamadas
Botones 1~3 Presione y sostenga Ingresar al buzón de voz de SIM1, SIM2, SIM3 Botones 4~9 Presione y sostenga Ingresa al botón de marcación rápida
correspondiente FUNCIÓN DE LLAMADAS HACER UNA LLAMADA: • Realizar una llamada desde la pantalla de inicio: 1. En la pantalla de inicio ingrese el código del área y el numero de teléfono. 2. Seleccione < Opciones - SIM1 llamar / SIM2 llamar / SIM3 llamar> para seleccionar SIM1, SIM2 ó
SIM3 y llamar. • Realizar una llamada internacional: 1. Ingrese el código del país (Para ingresar “+”, solo presione el botón + dos veces). 2. Ingrese el código del área (Generalmente se excluye el primer “0”) y luego ingrese el numero
telefónico. 3. Seleccione < Opciones - SIM1 llamar / SIM2 llamar / SIM3 llamar> para seleccionar SIM1, SIM2 ó
SIM3 y llamar. • Marcar a un numero extendido: 1. Ingrese el numero. 2. En la pantalla de llamada, seleccione < Opciones - Insertar - Pausar P>, luego ingrese el numero
extendido. 3. Seleccione < Opciones - SIM1 Llamar / SIM2 Llamar / SIM3 Llamar> > para seleccionar SIM1, SIM2
ó SIM3 y llamar. El numero de extensión se trasmite pocos segundos después de haberlo ingresado. RESPONDER O RECHAZAR UNA LLAMADA • Responder una llamada: Cuando este recibiendo una llamada, puede presionar el botón izquierdo suavemente para contestar la llamada. • Rechazar una llamada: Cuando reciba una llamada puede presionar el botón “END” para rechazarla. AJUSTAR EL VOLUMEN DE LLAMADAS Durante una llamada, puede presionar el botón de navegación para ajustar el volumen. FINALIZAR UNA LLAMADA Presione el botón “END” para finalizar la llamada. REGISTRO DE LLAMADAS • Ingrese al menú principal, y luego seleccione “Call Logs” (Registro de llamadas) para ingresar a la
lista de llamadas.

P-8
• En la pantalla de inicio presione el botón de llamadas 1/3 para visualizar la lista de llamadas. LLAMADAS REALIZADAS Muestra las llamadas recientes guardadas. LLAMADAS RECIBIDAS Muestra las llamadas recientes recibidas LLAMADAS PERDIDAS Muestra las llamadas recientes que no fueron respondidas LLAMADAS RECHAZADAS Muestra los números de teléfono de las llamadas que fueron rechazadas BORRAR TODO Borra todas las llamadas recibidas HORA DE LLAMADAS Seleccione la tarjeta SIM deseada, y luego podrá visualizar toda la información relevante sobre esa tarjeta SIM. COSTO DE LLAMADA (ES NECESARIO UN SOPORTE DE RED) • Costo total: graba el costo total de las llamadas de SIM1, SIM2 y SIM3. • Costo máximo: puede ser ajustado el limite máximo para el costo de una llamada. • Precio por unidad: graba la tarifa para SIM1, SIM2 y SIM3. • Restablecer costo: restablece el costo total de llamadas a cero. VOLUMEN GPRS Puede ver los detalles sobre la tasa de flujo GPRS. PERFILES DE USUARIO ESTÁNDAR • Activar: activar el perfil elegido. • Ajustar: ajustar las opciones requeridas. • Renombrar: modificar el nombre del perfil seleccionado. SILENCIO Para realizar los ajustes, refiérase a los ajustes del modo estándar VIBRADOR Para realizar los ajustes, refiérase a los ajustes del modo estándar SONIDO BAJO Para realizar los ajustes, refiérase a los ajustes del modo estándar

P-9
SONIDO ALTO Y VIBRADOR Para realizar los ajustes, refiérase a los ajustes del modo estándar CONTACTOS VISUALIZAR UN CONTACTO Ingrese los contactos, la unidad esta pre ajustada para mostrar la lista de contactos con todas las entradas. Presione el botón izquierdo y derecho para cambiar entre los diferentes grupos. AGREGAR UN NUEVO CONTACTO En la lista de contactos, seleccione < Opciones - Nuevo> para crear un nuevo contacto. • Teléfono: puede ser ingresado el nombre del contacto, teléfono móvil, teléfono de la casa, etc.
También se puede ajustar una imagen y tono especial para este contacto. • SIM1: el registro de entrada será guardado en la SIM1, con cada nombre y numero de teléfono. • SIM2: el registro de entrada será guardado en la SIM2, con cada nombre y numero de teléfono. • SIM3: el registro de entrada será guardado en la SIM3, con cada nombre y numero de teléfono. MENSAJE ESCRIBIR UN MENSAJE • Nuevo mensaje SMS: en la pantalla de inicio presione el botón izquierdo suavemente y seleccione
[Mensaje - Escribir mensaje - Nuevo SMS] para editar un nuevo mensaje directamente. Después de escribir un mensaje SMS, seleccione Enviar para enviar el mensaje.
• Nuevo MMS: MMS es un mensaje multimedia, soporta imágenes en formato GIF, JPEG, WBMP y BMP. en la pantalla de inicio presione el botón izquierdo suavemente y seleccione [Mensaje - Escribir mensaje - Nuevo MMS] para crear un nuevo MMS.
Precaución: El mensaje MMS solo puede ser usado cuando es soportado por el operador de red, y solo los teléfonos con función multimedia pueden recibirlos y mostrarlos normalmente. BANDEJA DE ENTRADA Almacena todos los mensajes SMS y MMS recibidos. BUZÓN DE SALIDA Almacena todos los mensajes SMS y MMS que no pudieron ser enviados. PROYECTOS Guarda los mensajes editados SMS y MMS que no han sido enviados. ENVIADOS Almacena todos los mensajes SMS y MMS que fueron enviados exitosamente. Si desea que el mensaje enviado sea guardado automáticamente, seleccione [Mensaje - Opciones], luego seleccione [ ajustes SMS - Guardar mensajes enviados - Guardar]

P-10
AJUSTE DE MENSAJES En la pantalla de inicio, presione el botón izquierdo suavemente para ingresar al menú principal, luego seleccione [Mensajes - Opciones] para ingresar al menú de ajustes de mensajes. PLANTILLAS Mientras edita el mensaje, puede citar directamente frases comunes. Seleccione <Editar> para ajustar la frase común usted mismo. BUZÓN DE VOZ Esta función trabaja como una maquina contestadora, y puede ser transferida una llamada perdida a su buzón de vos personal. El buzón de voz es una parte del software incluido proveído por el operador de red, así mismo, es necesario registrarse para activar esta función, y hacerlo manualmente en la unidad. Contacte a su operador de red para mas detalles. Precaución: Esto funciona para transferir llamadas de voz al buzón de voz (el numero de la llamada será dejado en un mensaje) ajustando “Desvío de llamadas” en la unidad. TRANSMISIÓN DE MENSAJES Puede recibir mensajes de texto transmitidos con varios contenidos a través del servicio de red, tales como noticias, el clima, o información del trafico. Para mas detalles consulte a su operador de red. AJUSTE DE MENSAJES SMS • Centro de mensaje SIM1: mientras envía un mensaje, debe ser ajustado el numero de centro de
servicio proveído por su operador de red. Muchas tarjetas SIM tienen este contenido predeterminado.
Precaución: Si el numero de centro de servicio es modificado o borrado, los mensajes no podrán ser enviado exitosamente. • Centro de mensaje SIM2: Refiérase a [Centro de mensaje SIM1]. • Centro de mensaje SIM3: Refiérase a [Centro de mensaje SIM1]. • Periodo de vigencia del mensaje: permite ajustar el tiempo de duración en el que el SMS
permanecerá en el centro de servicio. El periodo de vigencia depende del operador de red. • Reporte de estatus: seleccione [On], luego el centro de mensajes le informara cuando un mensaje
ha sido enviado exitosamente. • Guardar mensajes enviados: puede ser seleccionada la función para guardar los mensajes que han
sido enviados. • Almacenamiento preferido: puede seleccionar si desea guardar los mensajes SMS en la tarjeta SIM
o en el teléfono. AJUSTE DE MENSAJES MMS • Cuenta MMS SIM1 / Cuenta MMS SIM2 / Cuenta MMS SIM3: es posible seleccionar una de las
cuentas anteriores. • Entrega de reportes: seleccione [Activar], luego el centro MMS le informara si el destinatario ha
recibido y descargado el MMS.
P-11
• Enviar reporte leído: seleccione [Activar], luego recibirá un mensaje reportándole cuando el mensaje MMS ha sido leído por el destinatario.
• Mensaje anónimo: seleccione [Activar], y el mensaje será enviado al destinatario sin mostrar el numero de teléfono del remitente.
• Prioritario: ajuste el nivel de prioridad del MMS. • Recibir MMS: puede seleccionar entre [Recibir manual] ó [Recibir automático]. Si es activada la
función manual, usted deberá descargar de manera manual los mensajes MMS de la bandeja de entrada. Si ajusta la función automática, el teléfono automáticamente descargara los mensajes MMS recibidos una vez este activa la pantalla de inicio.
• Reproducir audio: después de activado, la unidad reproducirá sonido mientras lee los mensajes MMS.
• Permitir publicidad: después de ser activado, la unidad permitirá publicidad mientras es leído un mensaje MMS.
• Periodo de vigencia: puede ser ajustada la vigencia para el mensaje MMS. El periodo de tiempo depende del servicio proveído por el operador de red.
• Almacenamiento: puede seleccionar el lugar de almacenamiento deseado para las imágenes, archivos de música o video de MMS.
• Restaurar valores predeterminados: regresa a los valores preajustados. CAPACIDAD DE MENSAJE Puede visualizar la capacidad de memoria de SMS y MMS a través de esta función. INTERNET En la pantalla de inicio, presione la tecla izquierda y seleccione Internet. Precaución: 1. Su servicio de red puede no soportar algunas funciones. Con el fin de asegurar que su navegador
funcione normalmente, es necesario confirmar si su tarjeta SIM soporta y tiene la función de Internet activada.
2. Si navega por una pagina web, una tarifa será cargada. ENTRADA URL Ingrese al sitio web deseado, y seleccione OK para conectarse. PAGINA DE INICIO Seleccionando esta opción, su teléfono móvil visitará directamente la pagina preestablecida como pagina de inicio. Mientras navega en el sitio web, presione la tecla izquierda para cambiar entre barra de direcciones, sitios web y barra de herramientas. FAVORITOS Los favoritos pueden ser modificados por usted, ya que estos no han sido preestablecidos por fabrica. Guarde las paginas que usted mas visita en favoritos y márquelas simplemente con el nombre. Seleccione un nombre guardado, y luego la pagina correspondiente será conectada. Refiérase a los siguientes ajustes: • Añadir favorito: ingrese el nuevo sitio web con su nombre, y luego seleccione OK para guardarlo.

P-12
HISTORIAL Graba las paginas web que usted visito anteriormente. OFFLINE (SIN CONEXIÓN) Después de guardar una pagina web como instantánea, esta puede ser visitada mientras esta offline. AJUSTES WAP Ajustes de navegación: • Borrar cache: para evitar congestión y mejorar la velocidad de navegación, debe borrar el cache
regularmente. • Cuenta de red SIM1: establezca el puerto de red SIM1. • Cuenta de red SIM2: establezca el puerto de red SIM2. • Cuenta de red SIM3: establezca el puerto de red SIM3. • Descargar imagen: después de habilitar esta función, la imagen solo será mostrada después de
haber sido descargada. • Reproducción de música de fondo: una vez activada esta función, puede ser reproducida música de
fondo. • Aceptar “Push”: una vez activada esta función, puede recibir mensajes “Push”. Precaución: No cambie los ajustes sin conocimiento previo, ya que puede des configurar las funciones. ALMACENAMIENTO PREFERIDO: Puede elegir el lugar donde desea guardar las imágenes, archivos de música o video de Internet. AJUSTES GPRS Puede seleccionar abrir siempre GPRS o abrirlo solo cuando sea requerido. RESTAURAR VALORES PREDETERMINADOS Regrese los ajustes WAP a los ajustes predeterminados por fabrica. MULTIMEDIA CÁMARA Ingrese al menú principal y seleccione [Cámara], para ingresar a la pantalla de pre visualización de la cámara, presione el botón OK para tomar la fotografía. GRABADORA DE VIDEO Ingrese al menú principal, y seleccione [Grabadora de Video] para ingresar a la pantalla de pre visualización de video, y presione el botón OK para iniciar la grabación de video. TV MÓVIL En la pantalla de inicio, hale la antena, presione el botón izquierdo para ingresar al menú principal, y seleccione [TV] para ingresar a la función de televisión. La unidad automáticamente seleccionara el canal de TV cuando esta función esta siendo usada por primera vez. • Presione el botón Izquierdo / Derecho para ir al canal siguiente o anterior. • Presione Arriba / Abajo para ajustar el volumen.

P-13
• Presione el botón OK para mostrar en pantalla completa REPRODUCTOR DE AUDIO En pantalla de inicio, presione el botón izquierdo para ingresar al menú principal, y seleccione [Reproducción de Audio] para ingresar a la pantalla de reproducción de audio. Los siguientes iconos se muestran en la pantalla de reproducción:
/ Presione el botón OK para mostrar o pausar.
/ Presione el botón derecho / Izquierdo para saltar a la siguiente o anterior pista.
Muestra el volumen de reproducción, presione Arriba / Abajo para ajustar el volumen. REPRODUCTOR DE MÚSICA DE FONDO Mientras reproduce una canción, presione el botón END para quitar la pantalla de reproducción e ingresar al modo de reproducción de música de fondo. REPRODUCTOR DE VIDEO Ingrese al menú principal, y seleccione [Multimedia - Reproductor de video] Descripción de los iconos:
/ Presione el botón OK para mostrar o pausar
/ Presione el botón Derecho / Izquierdo para saltar a la siguiente o anterior pista.
Muestra el volumen de reproducción, presione Arriba / Abajo para ajustar el volumen. Archivos Soportados: AVI, 3GP, MP4 NAVEGACIÓN DE IMÁGENES Esta función proporciona un sistema de acceso para visualizar las fotos e imágenes. GRABACIÓN En la pantalla de inicio, presione la tecla izquierda para ingresar al menú principal, seleccione [Multimedia - Grabador], y luego seleccione <Opciones - Iniciar grabación>. Presione PAUSAR si desea detener la grabación por un momento y presione STOP (Detener) para detener la grabación por completo. Después de detener la grabación, esta será guardada automáticamente en la carpeta Audio. Presione
los botones Arriba / Abajo para seleccionar el icono ó seleccione <Opciones - Lista de archivos grabados> para revisarlo. RADIO FM En modo de espera (Standby), conecte los audífonos, presione el botón izquierdo para ingresar al menú principal, y luego seleccione [Radio FM]. El radio FM tiene una antena telescópica, por lo tanto este puede ser escuchado sin audífonos.
P-14
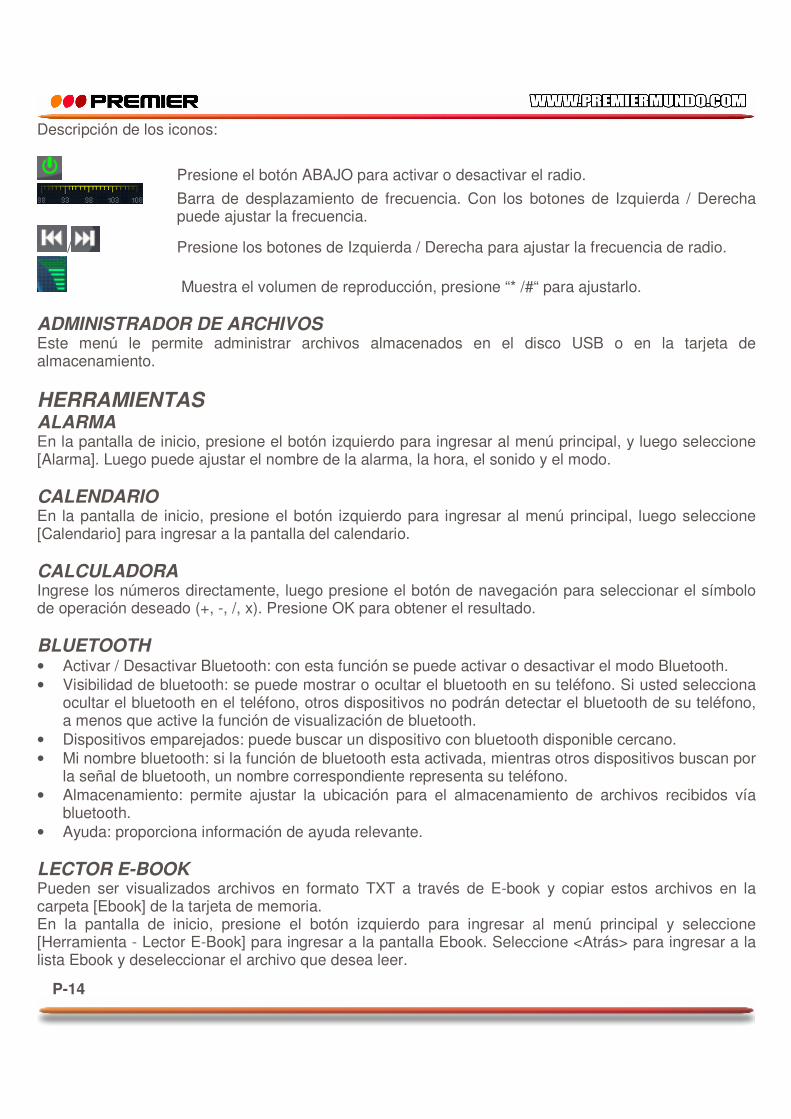
Descripción de los iconos:
Presione el botón ABAJO para activar o desactivar el radio. Barra de desplazamiento de frecuencia. Con los botones de Izquierda / Derecha
puede ajustar la frecuencia.
/ Presione los botones de Izquierda / Derecha para ajustar la frecuencia de radio.
Muestra el volumen de reproducción, presione “* /#“ para ajustarlo. ADMINISTRADOR DE ARCHIVOS Este menú le permite administrar archivos almacenados en el disco USB o en la tarjeta de almacenamiento. HERRAMIENTAS ALARMA En la pantalla de inicio, presione el botón izquierdo para ingresar al menú principal, y luego seleccione [Alarma]. Luego puede ajustar el nombre de la alarma, la hora, el sonido y el modo. CALENDARIO En la pantalla de inicio, presione el botón izquierdo para ingresar al menú principal, luego seleccione [Calendario] para ingresar a la pantalla del calendario. CALCULADORA Ingrese los números directamente, luego presione el botón de navegación para seleccionar el símbolo de operación deseado (+, -, /, x). Presione OK para obtener el resultado. BLUETOOTH • Activar / Desactivar Bluetooth: con esta función se puede activar o desactivar el modo Bluetooth. • Visibilidad de bluetooth: se puede mostrar o ocultar el bluetooth en su teléfono. Si usted selecciona
ocultar el bluetooth en el teléfono, otros dispositivos no podrán detectar el bluetooth de su teléfono, a menos que active la función de visualización de bluetooth.
• Dispositivos emparejados: puede buscar un dispositivo con bluetooth disponible cercano. • Mi nombre bluetooth: si la función de bluetooth esta activada, mientras otros dispositivos buscan por
la señal de bluetooth, un nombre correspondiente representa su teléfono. • Almacenamiento: permite ajustar la ubicación para el almacenamiento de archivos recibidos vía
bluetooth. • Ayuda: proporciona información de ayuda relevante. LECTOR E-BOOK Pueden ser visualizados archivos en formato TXT a través de E-book y copiar estos archivos en la carpeta [Ebook] de la tarjeta de memoria. En la pantalla de inicio, presione el botón izquierdo para ingresar al menú principal y seleccione [Herramienta - Lector E-Book] para ingresar a la pantalla Ebook. Seleccione <Atrás> para ingresar a la lista Ebook y deseleccionar el archivo que desea leer.

P-15
APLICACIONES SOKOBAN
Presione todas las cajas a su destino , luego puede pasar al siguiente nivel, presione el botón de navegación para mover el caracol.
AJUSTES AJUSTES DE LLAMADA Multi SIM: • Modo de espera (Standby): puede seleccionar este modo para la tarjeta SIM. • Principales ajustes de SIM:
§ Llamar: puede seleccionar el tipo de tarjeta SIM que desea usar, de acuerdo a su necesidad. Así mismo puede elegir el sistema mientras usa las funciones de llamada.
§ Marcación rápida: puede ser marcado un numero de teléfono a través de esta función en la tarjeta SIM en la que se encuentre.
• Ajuste del nombre de la tarjeta SIM: la tarjeta SIM puede ser nombrada como usted lo desee. Selección de red: • Selección automática: el teléfono puede buscar y registrar redes disponible de manera automática. • Selección de red: si esta función se encuentra activa, el teléfono buscara todas las redes
disponibles y las listara, y luego usted elige cual red desea registrar. Desviar llamada: Basado en el ajuste de condiciones de desvío, las llamadas entrantes serán enviadas al buzón de voz o a otros números telefónicos. • Transferencia incondicional: todas las llamadas entrantes serán transferidas al numero telefónico
predeterminado o a su buzón de voz. Seleccione el [Estatus de consulta] para visualizar el estatus de desvío de llamadas incondicional actual.
• Desviar si se encuentra ocupado: las llamadas entrantes serán transferidas al numero telefónico predeterminado o a su buzón de voz, si usted se encuentra usando su teléfono.
• Desviar si no responde la llamada: las llamadas entrantes serán transferidas al numero telefónico predeterminado o a su buzón de voz, si esta no ha sido respondida en el tiempo ajustado o si no va a ser respondida.
• Desviar si no se encuentra disponible: las llamadas entrantes serán transferidas al numero telefónico predeterminado o a su buzón de voz, si el teléfono se encuentra sin señal o apagado.
• Cancelar todos los desvíos: todos los desvíos de llamadas entrantes son cancelados. Restricción de llamadas: Esta función le ayuda a restringir las llamadas entrantes y salientes. Seleccione la llamada deseada y presione OK, luego puede seleccionar [Activado], [Apagado] ó [Estatus de Consulta]. Si activa la función, el teléfono necesitara el ajuste de soporte de red actual.

P-16
A continuación esta la restricción disponible de selección de llamadas: Opción Descripción
Todas las llamadas salientes Restringir todas las llamadas salientes Todas las llamadas entrantes Restringir todas las llamadas entrantes Recibir llamadas entrantes en modo “Roaming” No recibir llamadas entrantes en modo “Roaming” Llamadas internacionales Llamadas internacionales salientes prohibidas Llamadas internacionales en modo “Roaming” No recibir llamadas internacionales en modo
“Roaming” Cancelar todas las restricciones Cancelar todas las restricciones de llamadas Cambiar contraseña Función de restricción de llamadas Precaución: • Algunos operadores de red prohíben esta función. • Su operador de red le proporcionara la contraseña inicial mientras usted aplique para este servicio. Llamada en espera (Necesita un soporte de red) • Activada: si se activa esta función, la red lo alertara cuando este entrando una segunda llamada, y
puede recibir la otra llamada mientras usted se encuentre en la línea. • Desactivada: las llamadas entrantes no podrán ser recibidas mientras usted se encuentre llamando; • Estatus de consulta: selecciónelo para visualizar el estatus actual de esta función. ID oculto (Necesita soporte de red) • ID Oculto: al realizar una llamada, el destinatario no podrá ver su numero telefónico. • Mostrar el propio ID: al realizar una llamada, su numero telefónico será visible para el destinatario. • Mostrar ID por red: al realizar una llamada, su numero podrá ser o no visible dependiendo del pre
ajuste de red. Selección de línea: Puede elegir entre la línea 1 o la 2 según su necesidad. Modo de vuelo: • Activado: al activar esta función, todos los servicios de red no estarán disponibles • Seleccionar este modo al encenderse el teléfono. Otros: • Botón de acceso directo IP: después de activar esta función, seleccione <Opción - llamada IP>,
luego de pre ajustar el numero IP será añadido automáticamente antes el numero que usted desea para marcar y llamar por esta vía.
• Alerta de 50 segundos para llamada: si es activada esta función, una alerta sonara cada 50 segundos en una llamada, todo esto con el fin de controlar el tiempo de las llamadas y la tarifa.
• Modificar el sonido de llamadas conectadas: el teléfono vibrara para avisarle cuando el destinatario ha contestado a su llamada.
• Modo Rechazar: Usted puede decidir si desea enviar un mensaje SMS después de rechazar una llamada.
• Re-marcar: si activa esta función, el teléfono marcara de nuevo el numero telefónico después de una llamada no exitosa.

P-17
AJUSTE DE TELÉFONO Tiempo y fecha: • Ajuste de tiempo: ingrese el tiempo directamente o presione los botones Arriba / Abajo para
ajustarlo. • Ajuste de fecha: ingrese la fecha directamente o presione los botones Arriba / Abajo para ajustarla. Selección de idioma: El idioma puede ser seleccionado según sus preferencias. Encendido / Apagado automático: El teléfono puede ser ajustado para encenderse o apagarse a una hora determinada. Para el método de ajuste, diríjase a “Alarma”. Detección de movimiento: Esta función permite activar la función de rotación automática de la pantalla para fondos de pantalla en modo de espera y reproductor de audio. Aviso: el sensor de movimiento solo funciona con la luz de fondo activada. Si la luz de fondo esta apagada, el sensor de movimiento será desactivado. • Fondo de pantalla en modo de espera: seleccione [Fondo de pantalla en modo de espera] y agite el
teléfono de izquierda a derecha y de derecha a izquierda para ajustarlo. Aviso: esta función solo soporta el fondo de pantalla preestablecido, con otros fondos de pantalla esta no funcionara. • Reproductor MP3: seleccione [Reproductor MP3], y agite el teléfono de izquierda a derecha y de
derecha a izquierda para reproducir las pistas siguiente o anterior. Administrador de carga: Muestra la capacidad de carga. AJUSTES DE PANTALLA Ajuste de fondo de pantalla: Seleccione las imágenes preestablecidas u otras imágenes como fondo de pantalla del teléfono. Pantalla de encendido: Puede ser seleccionada una animación al encender o apagar el teléfono. Pantalla de apagado: Puede ser seleccionada una animación al encender o apagar el teléfono. Contraste: Presione los botones Izquierdo / Derecho para ajustar el contraste. Luz de fondo: Seleccione el tiempo de duración de la luz de fondo. Luz del teclado: Selección el tiempo de duración de la luz del teclado.

P-18
AJUSTES DE SEGURIDAD Con el fin de asegurar la información de su teléfono, pueden ser configurados el codigo PIN, código PIN2, contraseña y Función de bloqueo seguro. PIN: El código PIN es el numero de identificación personal de la tarjeta SIM. Si no ha sido modificado nunca, la contraseña inicial debe ser 1234 ó 0000. Si ha sido activado este código, entonces usted tendrá que ingresar la contraseña cada vez que encienda el teléfono. El código PIN puede ser modificado para evitar que su tarjeta SIM pueda ser usada por otras personas. Aviso: si el código PIN es ingresado 3 veces seguidas de manera incorrecta, la tarjeta SIM será bloqueada automáticamente, y deberá ingresar el código PUK para desbloquearla. El código PUK (PUK1) esta compuesto por 8 dígitos, no modificables. Cuando el teléfono se ha bloqueado por el código PIN, es necesario ingresar el código PUK correctamente para desbloquearlo. Si es ingresado el código PUK mas de 10 veces de manera incorrecta, la tarjeta SIM ya no podrá ser usada de nuevo. Algunos códigos PUK son proporcionados junto con la tarjeta SIM, y algunos deben ser pedidos al operador de red. Si no conoce el código PUK y su teléfono esta bloqueado, nunca ingrese un código que no sea el correcto, llame a su proveedor de red. Aviso: por favor sea cuidadoso cuando use esta función. En caso de olvidar su código PUK, llame a su operador de red. Seleccione el tipo de SIM deseado y siga las siguientes opciones: • Activado: deberá ingresar su código PIN cada vez que encienda el teléfono. • Modificar: el código PIN debe estar activado antes de modificarlo. • Desactivar: el código PIN debe ser ingresado antes de desactivarlo. PIN2: Este es el código de identificación personal requerido para ciertas funciones (Tales como configurar un numero fijado, ajustar la tarifa del teléfono, etc). El PIN2 se proporciona junto con la tarjeta SIM por el proveedor de servicio. Si este código es ingresado 3 veces seguidas de manera incorrecta, el teléfono se bloqueara hasta que el código PUK2 sea ingresado. Aviso: por favor sea cuidadoso al usar esta función, ya que si el código PUK2 es ingresado mas de 10 veces seguidas de manera incorrecta, la tarjeta SIM ya no podrá ser usada de nuevo. Privacidad: Asegurando su teléfono con contraseña, este será protegido de otros usuarios no autorizados. Cuando la función de contraseña ha sido activada para llamadas o mensajes, puede ser ingresada la correcta contraseña en el menú principal o sub-menú. La contraseña predeterminada es 1234. Bloqueo de teclado automático: Después de activada esta función, el teclado se bloqueara automáticamente, una vez el tiempo pre ajustado se cumple, esto con el fin de evitar errores de operación. • Bloqueo manual: en la pantalla de inicio, presione el botón “*” y seleccione <Bloquear>, para
bloquear el teclado manualmente.

P-19
• Desbloqueo manual: en la pantalla de inicio, seleccione <Desbloquear> y presione el botón de espacio para desbloquear el teclado manualmente.
Bloquear la pantalla con la tecla “END”: Una vez activada esta función, cuando la luz de fondo este encendida, presione la tecla END para apagar la luz de fondo y bloquear el teclado. Activar contraseña: La contraseña debe ser configurada cuando use esta función por primera vez. Después de activar esta función, debe ingresar la contraseña cada vez que encienda el teléfono. Precaución: La contraseña no tiene limite de entradas incorrectas. Aun así, tenga en cuenta elegir contraseñas que le sean fácil de recordar, ya que al olvidarla el teléfono no podrá ser usado normalmente. Bloqueo seguro: Esta función es apodada “Mobile Phone Dog”. Cuando otros usuarios no autorizados usen el teléfono de manera ilegal, alguna información será recogida y enviada al numero telefónico predeterminado; por otro lado, esta función impide a los demás el uso del teléfono después de cierto tiempo o después de haberlo encendido varias veces. Esta función esta pre ajustada como desactivada. Para encenderla, es necesario modificar la contraseña. Luego debe ingresar la contraseña, si quiere activarla, desactivarla o modificar la contraseña nuevamente. La contraseña debe tener 6 dígitos. Para activar esta función, se debe ingresar el numero telefónico predeterminado (este numero recibe el mensaje en caso de que su teléfono sea robado). Después de activada, el teléfono almacena el numero IMSI en la tarjeta SIM original. Si es ingresada otra tarjeta SIM, el sistema le solicitara que ingrese la contraseña de bloqueo seguro. Si usted ingresa la contraseña 3 veces seguidas de manera incorrecta, el teléfono se preestablecerá como ilegal y mostrara un aviso, luego recolectara y enviara información al numero telefónico que usted configuro anteriormente. Precaución: Reporte a la policía lo antes posible si el teléfono ha sido robado. Y asegúrese siempre de cuidar sus pertenecías. Use esta función cuidadosamente, ya que el teléfono no podrá ser usado si la contraseña ha sido olvidada. RESTAURAR LA CONFIGURACIÓN Ingrese la contraseña para regresar a los valores preestablecidos por fabrica. La contraseña inicial es 1234 PRECAUCIONES DE SEGURIDAD USO DEL TELÉFONO Recuerde acatar la normas de su localidad sobre el uso del teléfono: • Apague el teléfono cerca de lugares con explosivos, tales como estaciones de gas, Bunkers,
factores químicos, etc. Romper estas normas puede causar explosiones o lesiones. • No use teléfonos en aviones, ya que esto puede causar interferencias y causar daños. Asegúrese
siempre que este se encuentre apagado durante todo el vuelo.

P-20
• No use el teléfono mientras este manejando, de ser necesario, use los audífonos (Manos libres) o parquee su vehículo, todo esto con el fin de evitar accidentes o lesiones.
• Evite exponer el teléfono a altas temperaturas, ya que la batería puede explotar debido a las altas temperaturas.
DISPOSITIVOS MÉDICOS Apague el teléfono cerca de equipos médicos electrónicos. Si tiene alguna duda o pregunta, consulte con su medico ó con un centro de medicina. Marcapasos: Es necesario que se mantenga una distancia entre el teléfono y el marcapasos de al menos 15.3 cm, ya que el teléfono puede interferir con este dispositivo. Las personas que tienen marcapasos deben seguir las siguientes recomendaciones: • Mantener siempre una distancia de al menos 6 pulgadas (15.3cm) entre el teléfono y el marcapasos
cuando el teléfono se encuentre encendido. • No tener el teléfono en el bolsillo de la camisa • Usar el teléfono en el oído que este mas lejos del marcapasos. Precaución: Apague su teléfono si siente que esta causando interferencia y consulte con su medico lo antes posible. Audífonos: El teléfono puede generar interferencia con algunos audífonos, si esto le llega a suceder consulte con el fabricante de sus audífonos. Llamadas de emergencia: como el teléfono usa señales de radio, inalámbricas, red de comunicación a tierra y funciones de ajustes personales como otros teléfonos, es imposible asegurar que puede conectarse de manera exitosa en cualquier situación, así que por favor no use solo este dispositivo como medio para comunicarse en una situación de emergencia. Realizar una llamada de emergencia: si el teléfono se encuentra apagado, por favor enciéndalo y verifique que la señal de red sea lo suficientemente fuerte. 1. Ingrese el numero de emergencias correctamente. 2. Presione el botón para realizar llamadas. Precaución: mientras realice una llamada de emergencia, trate de brindar toda la información necesaria y trate de que esta sea lo mas precisa posible. En este caso, el teléfono puede ser la única herramienta de comunicación, así que no corte la llamada sin que se lo pidan. PRECAUCIONES AL CARGAR LA BATERÍA DEL TELÉFONO El teléfono usa una batería de litio. El tiempo de espera y el tiempo de llamadas se vera afectado por el medio ambiente del sistema y la configuración que tenga el teléfono. • Use siempre la batería aprobada y el cargador diseñado para esta unidad. La compañía no se
responsabiliza por daños causados por el uso de accesorios no aprobados. Precaución: 1. si la batería esta completamente descargada el icono se demorara en aparecer aproximadamente 2
ó 3 minutos. El tiempo de carga de la batería depende del estatus del teléfono (Si esta encendido, o están realizando llamadas), usualmente son 2-5 horas de carga.
• Con el fin de evitar daños evite tocar la batería o el cargador con las manos mojadas. • Trate de no usar el teléfono, mientras este se encuentre cargando. • Cuando la batería se ha cargado completamente, el icono que aparece en pantalla se ve

P-21
completamente lleno, en ese momento usted puede desconectar el cargador del celular. PRECAUCIONES AL USAR LA BATERÍA El uso de la batería depende de la red, ajustes del teléfono y situaciones de uso. Una batería de litio de 1500 amperios de capacidad permite un tiempo de llamada de hasta 4-6 horas, cuando tiene 3 tarjetas SIM en modo de espera 350-500 horas, dos tarjetas SIM en modo de espera de 400-550 horas, y la tarjeta SIM sencilla en modo de espera 450-550 horas. • Nunca use ninguna batería dañada. • El teléfono consumirá poca potencia si este se encuentra cerca de una estación de red. Por lo tanto,
el tiempo de llamadas y tiempo de espera depende en gran medida de la fuerza de la señal y los parámetros configurados por el operador de red.
• El tiempo de carga depende del cargador y del tipo de batería directamente. Cuando empiece a notar que el tiempo de carga se hace notablemente mas corto de lo normal, es tiempo de reemplazar la batería por una nueva.
• No conecte el ánodo o el cátodo de una batería en sentido inverso. • No exponga la batería a temperaturas demasiado altas o demasiado bajas, ya que la vida útil de
esta se verá reducida. Trate de mantenerla siempre en temperatura ambiente. • No someta la batería a cortos circuitos, ya que se puede dañar la base electrónica o el circuito de
protección interno. Almacene la batería separada de objetos de metal. • No queme la batería del teléfono, ni la deposite como un desecho ordinario, hágalo siempre
teniendo en cuenta las normas ambientales de su localidad, con el fin de evitar daños al medio ambiente.
• Si el teléfono, la batería u otro dispositivo de carga es sumergido accidentalmente en agua, no debe ponerlo dentro de un sistema de calefacción (tal como secadores, hornos microondas, etc) para secarlo, ya que pueden producirse explosiones.
La compañía no se hace responsable por cualquier daño causado por no seguir las instrucciones descritas en este manual de usuario. PRECAUCIÓN EN EL USO DE PIEZAS DE REPUESTO • Ponga las piezas (Tales como tarjeta SIM, Tarjeta de almacenamiento, batería, etc) fuera del
alcance de los niños. • Desconecte el teléfono en caso de que se encuentre cargando y apáguelo antes de remover la
batería de su compartimiento. • Mantenga todas las piezas secas y evite que estas entren en contacto con el agua. • Evite halar el cargador directamente del cable del poder para desconectarlo, hágalo desde su
enchufe. Si la batería y el teléfono no operan correctamente, comuníquese con un centro de servicio calificado para su revisión.
P-22
OTRA INFORMACIÓN DE SEGURIDAD • Si no va a usar el celular, apáguelo y remueva la batería, con el fin de evitar radiación. • No coloque el volumen muy fuerte cuando este usando el teléfono, ya que esto puede afectar sus
oídos. • Una persona que carezca de experiencia no debe abrir el celular ni tratar de reparar la batería. • Se recomienda que no use fundas con botones magnéticos, ya que estos pueden interferir con la
señal del teléfono, y tampoco debe usar fundas con botones fuertes, ya que al cerrarlas se puede rallar la pantalla LCD. Fundas plásticas pueden causar débil volatilización de vapor y dañar los componentes internos, por otro lado, es posible que el teléfono se oxide y pierda su color original.
• Su usted o alguien de su familia tiene un historial medico de mareos o epilepsia, es importante que consulte con su medico primero.
• Por favor no coloque la luz flash (esta función no esta disponible en todos los modelos) muy cerca de sus ojos o de los ojos de su mascota, ya que esto puede causar daños.
• Evite que el teléfono se caiga de lugares altos.


INSTRUCTION MANUAL CELPHONE W/TV
CEL-4343TV
DEAR CUSTOMER In order to achieve the best performance of your product, please read this instruction manual carefully before using, and keep it for future reference. If you need extra support, please write to [email protected]

Pagina 1
PREMIER CUSTOMER SERVICE Venezuela: 0800 – ELECTRIC (353-2874) Colombia: 01-900-331-PEJC (7352) Panama: 300-5185 Website www.premiermundo.com E-mail: [email protected] NOTE This unit may be submitted to changes in specifications, characteristics and/or operation without prior notice to the user, in order to continue improving and developing its technology.
CAUTION
RISK OF ELECTRIC SHOCK, DO NOT
OPEN
Caution: To reduce the risk of electric shock do not open this device, there are not serviceable parts for customers. Please refer any maintenance or repair to qualified personnel.
This sign means the existence of dangerous voltage at the inside of the unit, which states a risk of electric shock.
This sign means that there are important instructions of operation and handling in the manual that comes with this device.
Pagina 2
ÍNDICE FOREWORD .............................................................................................................................................4�DECLARATION.........................................................................................................................................4�SAFETY NOTICE ......................................................................................................................................5�GETTING TO KNOW YOUR PHONE........................................................................................................6�
YOUR PHONE .......................................................................................................................................6�INSTALLING SIM CARD AND BATTERY..............................................................................................6�INSTALLING STORAGE CARD.............................................................................................................6�BATTERY CHARGING ..........................................................................................................................7�POWER ON/ OFF ..................................................................................................................................7�USING SHORTCUT KEYS ....................................................................................................................7�
USING CALL FUNCTION .........................................................................................................................8�MAKING A CALL....................................................................................................................................8�ANSWERING OR REJECTING A CALL ................................................................................................8�ADJUSTING CALL VOLUME.................................................................................................................8�ENDING A CALL....................................................................................................................................8�DIALED CALLS......................................................................................................................................9�RECEIVED CALLS.................................................................................................................................9�MISSED CALLS .....................................................................................................................................9�REJECTED CALLS................................................................................................................................9�DELETE ALL..........................................................................................................................................9�CALL TIMERS........................................................................................................................................9�CALL COST (NEED THE NETWORK SUPPORT) ................................................................................9�GPRS VOLUME.....................................................................................................................................9�
USER PROFILES......................................................................................................................................9�STANDARD ...........................................................................................................................................9�SILENT.................................................................................................................................................10�VIBRATE..............................................................................................................................................10�LOW RING...........................................................................................................................................10�HIGH RING AND VIBRATE .................................................................................................................10�
CONTACTS.............................................................................................................................................10�VIEW A CONTACT ..............................................................................................................................10�ADDING A NEW CONTACT ................................................................................................................10�
MESSAGE...............................................................................................................................................10�WRITE MESSAGE...............................................................................................................................10�INBOX..................................................................................................................................................11�OUTBOX ..............................................................................................................................................11�DRAFTS...............................................................................................................................................11�SENTBOX ............................................................................................................................................11�MESSAGE SETTING...........................................................................................................................11�
INTERNET...............................................................................................................................................13�INPUT URL ..........................................................................................................................................13�HOMEPAGE ........................................................................................................................................13�BOOKMARK ........................................................................................................................................13�HISTORY .............................................................................................................................................13�
Pagina 3
OFFLINE ..............................................................................................................................................13�WAP SETTINGS ..................................................................................................................................13�
MULTIMEDIA ..........................................................................................................................................14�CAMERA..............................................................................................................................................14�VIDEO RECORDER.............................................................................................................................14�MOBILE TV ..........................................................................................................................................14�AUDIO PLAYER...................................................................................................................................14�VIDEO PLAYER...................................................................................................................................15�IMAGE BROWSER ..............................................................................................................................15�RECORDER.........................................................................................................................................15�FM RADIO............................................................................................................................................15�FILE MANAGER ..................................................................................................................................16�
TOOLS ....................................................................................................................................................16�ALARM.................................................................................................................................................16�CALENDAR..........................................................................................................................................16�CALCULATOR .....................................................................................................................................16�BLUETOOTH .......................................................................................................................................16�E-BOOK READER ...............................................................................................................................16�
APPLICATIONS ......................................................................................................................................16�SOKOBAN ...........................................................................................................................................16�
SETTINGS...............................................................................................................................................17�CALL SETTINGS .................................................................................................................................17�PHONE SETTINGS..............................................................................................................................19�DISPLAY SETTINGS ...........................................................................................................................19�SECURITY SETTINGS ........................................................................................................................20�RESTORE SETTINGS.........................................................................................................................22�
SAFETY PRECAUTION..........................................................................................................................23�USAGE ENVIRONMENT .....................................................................................................................23�MEDICAL DEVICES.............................................................................................................................23�PASSWORD ACCESS.........................................................................................................................24�CAUTIONS FOR BATTERY CHARGING ............................................................................................25�CAUTIONS FOR BATTERY USAGE ...................................................................................................25�CAUTIONS FOR SPARE PARTS USAGE...........................................................................................26�OTHER SAFETY INFORMATION........................................................................................................26�

Pagina 4
FOREWORD Dear customer, thank you for choosing CEL-4343TV MOBILE phone. The phone will give you unprecedented and pleasantly surprised experience: The phone supports three-GSM card and three -SIM standby functions.
The camera of high-definition digital will keep the colorful memories for you. The built-in MP3 and MP4 multimedia player will bring comprehensive enjoyment to you as well.
DECLARATION The content of this guide is protected by Copyright Law. It is forbidden to copy, distribute, publish or cite the content of this user guide, in whatever form without empowerment of our company. The company has carefully and closely reviewed the content of this user guide. Nevertheless, it is possible that there are mistakes and omissions. The pictures in this manual only works as the reference, please base on the actual picture while using the phone. The company reserves the right to update and improve any products described in this guide, as well as the content of this guide. Amendments will be made without prior notification. This is the user guide for the mobile phone only and does not include an introduction to this product’s software and hardware configuration. Some functions mentioned in this guide also need the support of a network operator or service provider. If you are unable to confirm whether you will be able to use certain functions or services with this phone, please consult your network operator or service provider. The phone may include some commodities, technology or software, which is under the control of export law, and regulations of China or other countries and areas; therefore, any illegal transfer action is forbidden. In the fullest extent permitted by applicable law, in any case, the company or the party with its permit should take no responsibility for any loss of data, income and any special, occasional or indirect loss, no matter what reason it caused by. In order to ensure your safety, please read the “Safety Notice” and “Safety Precaution”. Typographic conventions used in this user guide include: <>: Shows function key; “ ”: Shows prompts on the phone interface; :Shows the keys;
[ ]: Shows the phone menus.

Pagina 5
SAFETY NOTICE Before using the phone, please read and follow below rules carefully.
If you dial or answer a call while driving, please use the hands-free device or use your phone after parking the vehicle.
Please make sure your phone is switched off or in flight mode during the whole flight, for mobile phone will interfere with the communication network for the airplane.
All phones may be susceptible to interference, which could affect performance.
Please switch off your phone near medical devices or places which phone using is forbidden.
In order to ensure high performance and to avoid damage the phone, please use the original accessories and battery. Please do no use products which are not compatible.
To avoid the risk of any explosion, please switch off the phone at gas stations and places near fuel, chemicals or other dangerous substances.
To avoid interfering blasting operation, please switch off your phone in blasting scene or areas with sign “Turn off bidirectional radios. Pay attention to and obey any relevant rules and regulations.
Please don’t burn the phone battery or treat it as ordinary rubbish as this could endanger life and damage the environment. Please obey local environmental policy, and dispose and recycle them timely.
If you need to connect your phone to other devices, please read the user guide of that device carefully for safety.
Keep small parts (e.g. Storage card) out of the reach of children, to prevent them from being swallowed or causing other dangers.
Please back up the important phone information or to have a handwritten record to avoid important data lost.
���
Make sure the phone is switched on and within service coverage before dialling the emergency number. Press the call key to inform your position. Don’t end the call unless told to do so.

Pagina 6
GETTING TO KNOW YOUR PHONE YOUR PHONE Status icons
Icon Function description
Represent current SIM1, SIM2 and SIM3 network signal. The more bars, the stronger the signal
Flight mode
Battery status, more bars indicate more battery capacity left
Unread MMS
MMS memory full
MMS downloading
Headset mode
Unread SMS
SMS memory full
Clock has set
Bluetooth function is activated
Profile has set as Silent Mode
Profile has set as Low ring Mode
Profile has set as High ring and vibrate Mode
Profile has set as Vibrate Mode
INSTALLING SIM CARD AND BATTERY (1) Hold on End Key for about three seconds. (2) Slide the battery cover in the direction of the bottom of the phone and then remove it. (3) Remove the battery. (4) Follow the sign for SIM1, SIM2 and SIM3 on the phone to install SIM1, SIM2 and SIM3. Please make
sure that the golden contacts of the card face downwards, then push the card gently until it fixes itself in the card slot.
(5) Replace the battery with its golden contact part facing the set phone battery contact piece, and then replace the battery cover.
INSTALLING STORAGE CARD (1) Hold on End Key for about three seconds to switch off the phone. (2) Remove the battery cover.

Pagina 7
(3) Follow the arrow direction of "OPEN" on the T-Card slot cover, open card slot cover, put the T-Card into the slot vertically, make sure that the gold contacts of the card face upwards, until the card fixes itself in the card slot.
(4) Follow the arrow direction of "LOCK" on the T-Card slot cover, pull card slot cover to lock the card slot. BATTERY CHARGING Charged by the travel charger (1) Install the battery correctly into the phone. (2) Insert the lead of the travel charger to connecting slot of the phone, and then connect the charger to a
standard power socket.
When charging is complete, unplug the charger from the standard power socket first, and then disconnect the phone and charger.
Caution 1. Please use the approved battery and charger designated for this product, otherwise it may cause an explosion. 2. If the battery is completely empty, the battery icon will appear after charging for two to three minutes. Generally, the charging time is 2-5 hours, depending on the current status of the phone (whether switched on, during a phone call etc). 3. Please use charger to charge, try best to avoid charging via USB cable. 4. For optimal battery performance, charge and discharge the new battery two or three times. The first several times you charge the battery, charge it for at least 10 hours.
POWER ON/ OFF Power on Hold on End Key for three seconds to switch on the phone. Power off Hold on End Key for three seconds to switch off the phone.
Warning: Don’t switch the phone on in areas where wireless phone usage is prohibited or where it may cause interference or danger, and also make sure that you haven’t activated the function “Auto power on/off”.
USING SHORTCUT KEYS Pressing some keys directly from the Home Screen provides direct access to common phone functions.

Pagina 8
Key Operation Function
Call key 1/3 press briefly Enter Call History
1 3 Keys hold on Enter voicemail box for SIM1 , SIM2 or SIM3
4 9 Key hold on Enter the corresponding speed dial
USING CALL FUNCTION MAKING A CALL Directly call on Home Screen (3) On the Home Screen, input the area code and phone number. (4) Click <Options SIM1 call/ SIM2 call/ SIM3 call > to select SIM 1 , SIM 2 or SIM 3 to call.
Make an international call (5) Enter the country code (To enter ”+”, just press * Key twice). (6) Enter the area code (Usually exclude the first “0”) and the phone number. (7) Click <Options SIM1 call/ SIM2 call/ SIM3 call > to select SIM 1 , SIM 2 or SIM 3 to call. Dial an extension number (8) Enter the switchboard number. (9) On the Dialling screen, select <Options Insert Pause P>, then enter the extension number. (10) Click <Options SIM1 call/ SIM2 call/ SIM3 call > to select SIM 1 , SIM 2 or SIM 3 to call. The
extension number will be transmitted in few seconds after getting through the switchboard.
ANSWERING OR REJECTING A CALL Answer a call
When there is an incoming call, you can press Left Soft Key to answer.
Reject a call
When there is an incoming call, you can press End Key to reject it.
ADJUSTING CALL VOLUME During a call, you can press Navigation Key to adjust the earphone volume. ENDING A CALL Press End Key to end the call.

Pagina 9
Call logs v Enter the main menu, and then select [Call logs] to enter the call list. v On the Home Screen, press Call Key 1/3 to view call list.
DIALED CALLS Display recent call records. RECEIVED CALLS Display recent calls received. MISSED CALLS Display recent calls unpicked up. REJECTED CALLS Display the phone numbers set as rejected calls. DELETE ALL Delete all the call entries. CALL TIMERS Select the desired SIM Card, and then you can view all relevant information about the SIM Card.
CALL COST (NEED THE NETWORK SUPPORT) v Total cost: Record total call charges for SIM1, SIM2 and SIM3. v Max cost: You can set the desired upper limit for call costs. v Price per unit: Record the cost rate for SIM1, SIM2 and SIM3. v Reset cost: Reset the total call charges as zero.
GPRS VOLUME You can view the detail about GPRS flowrate.
USER PROFILES STANDARD v Activate: Activate the chosen profile. v Settings: Set the options as required. v Rename: Modify the name of the selected profile.

Pagina 10
SILENT For the settings, please refer to”Standard”. VIBRATE For the settings, please refer to”Standard”. LOW RING For the settings, please refer to”Standard”. HIGH RING AND VIBRATE For the settings, please refer to”Standard”.
CONTACTS VIEW A CONTACT Enter the contacts, the phone is defaulted to show contact list with all entries. Press Left Key/Right Key to switch between different groups.
ADDING A NEW CONTACT On the Contacts list, select<Options New>to create a new contact. v Phone: You can input the contact name, mobile number, home number, etc. You can also set special
image and ring for the contact entry v SIM1: The input record will be saved to SIM1, with each name one phone number. v SIM2: The input record will be saved to SIM2, with each name one phone number. v SIM3: The input record will be saved to SIM3, with each name one phone number.
MESSAGE WRITE MESSAGE New SMS On the Home Screen, press Left Soft Key and select [Message Write message New SMS] to edit a new SMS directly. After writing an SMS, click < Send > to send the message.
New MMS MMS is a multimedia message, supporting pictures in GIF, JPEG, WBMP, and BMP format.
Caution The MMS can only be used when it is supported by the network operator; and only phones with multimedia function can receive and normally display it.

Pagina 11
On the Home Screen, press Left Soft Key and select [Message Write message New MMS] to create a new MMS. INBOX Store all received SMS and MMS. OUTBOX Store all SMS and MMS failed to be sent.
DRAFTS Save edited SMS and MMS haven’t sent.
SENTBOX Store all the SMS and MMS successfully sent out. If you want the sent messages be saved automatically, please select [Message Options], then select [SMS settings Save sent messages Save].
MESSAGE SETTING On the Home Screen, press Left Soft Key to enter the main menu, then select [Message Options] to enter the message setting menu.
Templates While editing messages, you can directly cite the preset common phrases. Select <Edit> to set the common phrases by yourselves. Voice mail server This function works like an answering machine, which can transfer a missed call to your personal voice mail, allowing the caller to leave a voice message and notify you by an SMS. Voice Mail is a part of the bundled software provided by network operator, therefore, you need to register to active this function, and manually set the phone. Please contact with your network operator for more details.
Caution It’s workable to transfer the voice call into the voice mail (The number the call will leave a message) by setting “Divert calls”.
Broadcast message You can receive broadcast text messages with various contents via network service, such as news, weather or traffic information. For more details, please consult your network operator.

Pagina 12
SMS settings v SIM1 msg center: While sending messages, you must set the service center number provided by
network operator. Most SIM cards defaulted contain the service center number. You can also gain this number directly from the network operator.
v
Caution: If you modify or delete the service center number, an SMS might not be sent successfully.
v SIM2 msg center: Please refer to [SIM1 msg center]. v SIM3 msg center: Please refer to [SIM1 msg center]. v Message validity period: Allows you to set the length of time during which your SMS will be stored in
the message center. The validity period depends on the network operator. v Status report: Select [On], then the text message center will inform you when you successfully sent a
message. v Save sent messages: You can select whether to save the sent message or not. v Preferred storage: You can select to save the SMS to the SIM card or the phone first.
MMS settings v SIM1 MMS account/SIM2 MMS account/ SIM3 MMS account: You can select SIM1/SIM2/SIM3
MMS account. v Delivery report: Select [Activate], then the MMS center will inform you that the recipient has received
and downloaded the MMS. v Send read report: Click [Activate], then you will receive a report message when the sent MMS has
been read by the recipients. v Anonymous send: Select [Activate], the MMS will be sent to the desired recipient without displaying
the sender’s phone number. v Priority: Set the priority level for MMS. v Receive MMS: You can select [Manual receive] between [Auto receive]. If manual retrieve function
is activated, then you have to manually download the received MMS from the inbox; if auto function is chosen, then the phone will automatically download the received MMS once the phone is back to the Home Screen.
v Play audio: After activated, the phone will play sound while reading a MMS. v Allow adversting: After activated, the phone will receive advertisement while receiving a MMS. v Validity period: You can set the validity for the MMS. The period depends on the service provided by
network operator. v Storage: You can select the desired storage location for pictures, music or video files of MMS. v Restore default: Reset to the default setting.
Message capacity You can view memory capacity status for SMS and MMS via this function.
Pagina 13
INTERNET On the Home screen, press Left Soft Key and select [Internet].
Caution
1 Your network service provider may not support some functions. In order to ensure the browser work normally, please confirm first that your SIM card supports and have the Internet function activated. 2. If you browse the web page, flowrate fee will be charged.
INPUT URL Enter the wanted website, and click <OK> to connect it.
HOMEPAGE By selecting this option, your mobile phone will directly visit the preset or defaulted homepage. While browsing the website, press Left Soft Key to switch between address bar, websites and tool bar. BOOKMARK Bookmarks are defaulted as blank, and you are able to edit it as you want. Save the common visited website into the Favorites, and marked by simple names. Select one saved name, then the corresponding web will be connected. Please refer to below setting: v Add bookmark: Enter the new bookmark address and name, then select <OK> to save it.
HISTORY Record the websites you visited before.
OFFLINE After saving a website as snapshot, you can browse the website while offline.
WAP SETTINGS Browser settings v Clear cache: In order to avoid congestion and improve the web browsing speed, please clear the
cache regularly. v SIM1 network account: Set the SIM1 network port. v SIM2 network account: Set the SIM2 network port. v SIM3 network account: Set the SIM3 network port. v Download image: After enabling this function, the image will only be displayed after being
downloaded. v Play background sound: After enabling this function, you can play background music.

Pagina 14
v Accept push: If enabling this function, you can receive Push messages.
Caution: Do not arbitrarily change the settings, or you may not normally visit the website.
Preferred storage You can choose the place where to save the picture, music or video files from the Internet. GPRS setting You can select to always open GPRS or open it when required. Restore default Reset the WAP settings back to the factory set MULTIMEDIA CAMERA Enter the main menu, and select [Camera] to enter the camera preview screen, press OK Key to take a photo. VIDEO RECORDER Enter the main menu, and select [Video recorder] to enter the video preview screen, and press OK Key to start recording the video.
MOBILE TV On Home Screen, pull the antenna, press Left Soft Key to enter the main menu, and select [TV] to enter the TV function. The phone will automatically select the TV channel when the TV function is used for the very first time.
v Press Left/Right Key to switch between last or next channel v Press Up/Down Key to adjust the volume v Press OK Key to display on full screen
AUDIO PLAYER On Home Screen, press Left Soft Key to enter the Main menu, and select [Audio player] to enter the Audio Player screen: The below table shows the icons on the Player screen:
Icon Description
/ Press OK Key to display or pause
/ Press Left/Right Key to skip to last /next one

Pagina 15
Show the playing volume, press Up/Down Key to turn up/down the volume
Background audio player While playing a song, press End Key to quit the Playing screen to enter the background playing mode.
VIDEO PLAYER Enter the Main menu, and click [Multimedia Video player]. Icon description:
Icon Description
/ Press OK Key to display or pause
/ Press Left/Right Key to skip to last /next one
Show the playing volume, press Up/Down Key to turn up/down the volume
IMAGE BROWSER The function provides a prompt access to view the photos and pictures.
RECORDER On Home Screen, press Left Soft Key to enter the main menu, select [Multimedia Recorder], and choose <Options Start recording> to start recording. Select <Pause> to have the recording pause for a while, select <Stop> to cease recording. After ceasing the recording, the recorded file will be automatically save in the folder [Audio], press Up/Down Key to select or select <OptionsRecord file list> to check. FM RADIO On standby mode, plug the earphone, press Left Soft Key to enter the Main menu, then select [FM radio]. FM radio has a telescopic antenna. You can listen to the radio without headset. Icon description:
Icon Description
Press Down Key to activate or deactivate the radio
Frequency scrolling bar, press Left/Right Key to adjust the frequency
/ Press Left /Right Key to adjust the radio frequency.
Display the player volume, Press”* /#“to adjust it

Pagina 16
FILE MANAGER This menu allows you to manage files stored in the USB disk or storage card.
TOOLS ALARM On the Home Screen, press Left Soft Key to enter the main menu, and select [Alarm], then you can set the alarm name, time, ring and mode. CALENDAR On the Home Screen, press Left Soft Key to enter the main menu, and select [Calendar] to enter the Calendar screen. CALCULATOR Directly input numbers, press Navigation Key to select your desired operation symbols (+, -, /, X). Press OK Key to get the answer.
BLUETOOTH v Open/Close bluetooth: This function allows you to switch the Bluetooth on or off. v Bluetooth visibility: Set to show or hide the Bluetooth of your phone. If you select to hide the phone,
other devices cannot detect the Bluetooth device of your phone, even you activated your Bluetooth function.
v Paired device: You can search for the nearby Bluetooth-enabled devices v My Bluetooth name: If Bluetooth function activated, while other devices search for Bluetooth signal,
the corresponding name represents your phone. v Storage: Able to set the storage location for files received via Bluetooth. v Help: Provide relevant Bluetooth helping information.
E-BOOK READER You can view file in TXT format by Ebook and copy the TXT file to the [Ebook] folder in the memory card from your PC. On the Home Screen, press Left Soft Key to enter the main menu and select [Tools E-Book reader] to enter the Ebook screen you read last time. Select <Back> to enter the Ebook list and reselect the desired file to read. APPLICATIONS SOKOBAN Push all the boxes to the destination , then you can go to the next game level, press Navigation Key to move the snail.

Pagina 17
SETTINGS CALL SETTINGS Multi-SIM v Standby mode: You can select the standby mode for SIM card. v Main SIM settings: There are several types as per below: Ø Call: You may choose SIM card type to be used according to your need, and you may also choose
to have prompt choice while using call functions. Ø Speed dial: If enabling this function, you can speed dial the phone number via the preset SIM card.
v Set SIM name: You can name the Card as you want. Network selection v Auto select: The phone can automatically search and register available networks. v Manual select: Enable this function, the phone will search for the network, and list all searched
networks, then you need to choose the one needed to register. Call divert Based the set diverting conditions, incoming calls will be forward into voice mail or other numbers. v Unconditional transfer: All incoming calls will be transferred to the preset number or your voice mail.
Select Query status to view the current unconditional call divert status. v Divert if busy: Calls will be transferred to the voice mail or the preset phone number when you are on
the phone. v Divert if no answer options: Calls will be transferred to the voice mail or the preset phone number, if
the set time is over and phone still won’t be answered. v Divert if unreachable: Calls will be transferred to the appointed number or your voice mail, when your
phone is out of the service coverage or is switched off. v Cancel all diverts: All Call Divert functions are cancelled.
Call barring This function helps you to restrict the incoming and outgoing calls. Select the desired call and press <OK>, then you can select [Activated], [Off] or [Query status]. Select [Activated], the phone will need network support current setting. Below are the available restricted call selections.
Option Description
All outgoing calls Restrict all outgoing calls
All incoming calls Restrict all incoming calls
Incoming calls when roaming No incoming calls while roaming
International calling Outgoing international calls forbidden
Dial when INTL roaming Incoming international roaming forbidden

Pagina 18
Cancel all barring Cancel all call restrictions
Change password Change the password for Call Restrict function
Caution
1 Some network operators forbid the function. For more details, please contact your network service provider. 2. The network operator will provide you the initial network password while you apply for this service.
Call waiting (Need network support) v Activate: If you set the function on, the network will alert you that there is an incoming call. You can
keep current call and answer another one. v Off: Cancel call waiting function, then the new incoming calls won’t be answered while you’re on the
phone already. v Query status: Select it to view current status of this function.
Hide ID (Need network support) v Hide ID: While calling, the recipient won’t see your phone number. v Display own ID: While calling, your phone number will be visible for the recipient. v Display ID by network: While calling, whether your phone number will be visible or not for the
receiver depends on the network presetting.
Select line You can choose line 1 or line 2 as you need.
Flight mode v Activate: Activate flight mode, then all network service won’t be available. v Select when power on: You can select whether to activate flight mode when power on.
Others v IP shortcut key After activating this function, selecting <Option IP Call>, then preset IP number will be automatically added before the number you want to dial and call via it. v 50 sec voice call alert If you activate the function, an elapsed time reminder will be heard at the 50th second of every minute during your call, so that you may end the call timely to save the phone fare. v Alter for voice call connected The phone will vibrate to prompt you when the recipient answers your phone. v Answer /Reject mode Ø Reply SMS after reject: You can select whether to reply an SMS after rejecting a call.

Pagina 19
v Auto redial If you set this function on, the phone will redial the number after an unsuccessful call,
PHONE SETTINGS Time and date v Set time: Directly input the time or press Up /Down Key to set it. v Set date: Directly input the date or press Up /Down Key to set it. Select language You can select the language you want. Auto power on/off You can set the phone to switch on/off at a scheduled time. For the setting method, please refer to “Alarm”. Motion detection
The function allows you to activate the screen auto-rotating function for idle wallpaper and audio player.
Notice Motion sensor only works when screen backlight functions. If the backlight is off, then the motion sensor will be deactivated and there won’t be any responses.
v Idle wallpaper: Click [Idle wallpaper], then process “Accelerating shaking from right to left”, therefore the wallpaper will be switched as last defaulted one on the list; process “Accelerating shaking from left to right”, then the wallpaper will be switched as the next defaulted one on the list.
Notice: Current wallpaper switching function only supports the defaulted wallpaper. For customized paper, it won’t work.
v MP3 player: Click [MP3 player], process “Accelerating shaking from right to left”, therefore the
song will be skipped to last defaulted one on the playlist; process “Accelerating shaking from left to right”, then the song will be switched as the next defaulted one on the playlist.
Power management Display the battery capacity. DISPLAY SETTINGS Wallpaper settings Select the default or other pictures as the wallpaper of the phone.

Pagina 20
Power on display You can select the preset animation or others as the Power on animation for your phone. Power off display You can select the preset animation or others as the Power off animation for your phone. Contrast Press Left /Right Key to adjust the contrast. Backlight Select the desired backlight time. Keypad light Select the desired keypad light time. SECURITY SETTINGS In order to secure the information, you can set PIN code, PIN2 code, power-on password and Guardlock function. PIN PIN code is the personal identification number for SIM card. If never be modified, the initial password set by network operator should be 1234 or 0000. If activated the power-on PIN code, then you have to input the PIN password each time you switch the phone on. You can modify the PIN code to prevent your SIM card being used by others.
Caution If you input your PIN code incorrectly three times in succession, the SIM card will be locked automatically, and prompting to enter PUK code to unlock it. Therefore, please do remember the PIN code, if you modify it.
PUK code (PUK1) is made up by 8 digits, unmodifiable. When the phone is locked by PIN code, please enter correct PUK code to unlock the phone. If you incorrectly input the PUK code ten times in succession, then the SIM card cannot be used any more. Some PUK codes are provided together with the SIM card, some should be gained from the network service provider. If you don’t know the PUK code while your PIN code is locked, please never input the code casually. In this case, please call the hotline of the service provider for your SIM card, after simply checking about the user identity, you can gain the PUK code for free to unlock your phone.
Caution Please be careful when use this function. If you forget PUK code, please consult your network operator. If you incorrectly input the PUK code ten times in succession, the SIM card will be scrap.
Select the desired SIM type and have the following options:
Pagina 21
v Activated: You should input PIN code each time switching the phone on. v Modify: You should activate PIN code before modifying it. v Off: You should input the correct PIN code before deactivating it. PIN2 PIN2 code is the personal identification code required for some certain functions (such as set fixed number, set phone fare, etc). PIN2 code is another password provided together with SIM card by service provider. If wrongly input it for three times in succession, the phone will be locked until correct PUK2 code entered, for detailed operation, please refer to PIN code and PUK code.
Caution If you incorrectly input the PUK2 code ten times in succession, you will not be able to use SIM card. Please be careful when use this function.
Privacy Secured by phone password, the phone will be protected from other unauthorized users. When password function has been activated for call logs or messages, you have to enter correct password on corresponding main menu or sub-menu. The defaulted password is “1234”. Auto keypad lock After activating this function, the phone will be locked automatically if the time you set is arrived, so as to avoid error operations. v Manual lock keypad: On the Home screen, press * Key and select <Lock> to lock the keypad
manually. v Manual unlock keypad: On the Home screen, select <Unlock> and press SPACE Key to unlock
the keypad manually. Lock screen by end-key Once activated this function, when the backlight is on, press End Key to turn off the backlight and auto lock the keypad. Power-on password You should set the power on password when you use this function for the first time. After activated this function, you should input password each time you switch the phone on.
Caution: Power on PWD doesn’t have the limitation for wrongly inputting. Please remember carefully about the Power on PWD, otherwise, the phone won’t be switched on normally once password forgotten.

Pagina 22
Guardlock Guardlock (MSD) is nicknamed as Mobile Phone Dog. When others illegally use your phone, information like CELLID of the phone will be collected and sent to preset mobile phone; moreover, the function will prevent others to use the phone after certain times or certain power-on times. This function is defaulted to be off. To activate it, please modify the password. Then you need to enter the password if you want to activate, deactivate, or modify the password to process operation, and the password has 6 digits. To activate it, you have to enter a preset mobile phone number (The mobile phone number set to receive the message if the phone is stolen) apart from the password. After activated, the phone stores the IMSI number for original SIM card, which is sole and unique, if you insert another SIM card, there will be a prompt, asking you to input the guardlock password. If you wrongly enter the password for three times in succession, the phone will default it as illegal and display a relevant prompt, then collect and send information like CELLID, LAC, MCC, MNC, MCN to preset mobile phone number. While receiving this message, legal user can report it to the police, who can inquire the illegal usage situation (Including the used location, call history, etc) from network operator via the piece of information. The message will be kept senting to the preset mobile phone till it is successfully received. If the stolen phone is on over 24 hours or re-switch on, the phone will resend a message to your preset phone number. When the message has been successfully sent up to 15 times, any illegally used SIM card won’t work in the stolen phone, which will automatically switched off.
Caution: Please report to the police timely if the phone is stolen, but this doesn’t mean that the lost phone will be definitely traced back. Therefore, please take care of your personal property.
If the phone defaults the SIM card inserted is illegal, then guardlock function can not be activated, and relevant setting can not work. If another SIM card is inserted, enter correct password, message count will be sent from zero, meanwhile, there will be a prompt, asking you whether to bind this SIM card. Select binding, then the phone will renew the IMSI number and default the SIM card as the designated one. v Activated: Before activating this function, please set the password first, if password hasn’t been set,
the phone will hint “Change password first”, then please enter [Change password] to finish the password setting and back to activate this function. While activating it, guardlock password and notified mobile phone number (The number to receive the information of the SIM card illegally used in the stolen phone) are required. After these, guardlock function will work.
v Off: To deactivate guardlock function, you should input correct Guardlock password. v Change password: Modify guardlock password. v
Warning: Please use this function carefully. The phone won’t be used if password forgotten.
RESTORE SETTINGS

Pagina 23
Reset all parameter values into default status. Please enter the privacy preserving password (Initial password is 1234) to resume factory setting.
SAFETY PRECAUTION USAGE ENVIRONMENT Please remember to obey relevant rules and regulations whenever use your phone. This will prevent bad effect from you and the environment.
v Switch off your phone near explosive places, such as gas station, bunkers, chemical factories or blasting scene, and adhere to any safety signs and instructions there. Breaking any rules may cause explosion or injury.
v Phone using in plane will interfere with the flight operation and bring dangers. Therefore, please do switch off your phone before boarding, and make sure it is power off during the whole flight.
v Please keep the phone in its special bracket while you’re driving. Please don’t put it on a seat or in places where it could fall off when the car encounters collision or break. In order to ensure safe driving and avoid road accidents, please don’t use the phone when driving. If you must use it, please use the phone’s hands-free asset or park at roadside before making or answering a call.
v Please put the phone away from the high temperature environment, for explosion might be caused when the battery is of excess high temperature.
MEDICAL DEVICES Please switch off your phone in areas near the electronic medical equipments that obviously requires switching the phone off (Such as heart pacemakers, hearing aids, etc). Most medical devices can shield the phone’s RF signal, but some can’t. If you have any doubts or need to find out more, please consult your doctor or medical device manufacturer.
Pacemaker Pacemaker manufacturers advise the distance between your phone and heart pacemaker should be 6 inches (15.3 cm) at least, otherwise the phone could interfere with the pacemaker. The personnel who wears pacemaker should do the followings: v Should always keep a distance (at lease 6 inches) between the phone and pacemaker, when the
phone is switched on. v Should not have the phone in a breast pocket v Should listen to the phone closer to the ear which is farther from the pacemaker.
Caution: Please switch off your phone while you feel there is interference, and consult the doctor timely.
Hearing aids Mobile phone might bring some interference to some hearing aids. If so, please consult the hearing aids manufacturer.
Emergency calls As the phone uses a radio signal, wireless and ground communication network and personal settings

Pagina 24
functions like other phones, it is impossible to ensure your phone can be connected successfully in any situation, so please don’t rely purely on your phone as the only means of notification in cases of emergency (such as medical first aid ). Make an emergency call If your phone is switched off, please turn on your phone and check whether the network signal is strong enough.
(11) Input the local first aid number correctly (such as 120), different areas have different first aid numbers.
(12) Please press the call key to call.
Caution: While making an emergency call, you should try best to provide all important information precisely. At this time, the phone may be the only communication tool, so don’t end the call without permission.
PASSWORD ACCESS Your phone and SIM card can be protected by a password to prevent others using them illegally. Phone password This protects your phone from unauthorized users. You can set the preset password when you use it for the first time. After using it, please modify your phone password as soon as possible and keep it secret. PIN code This is personal identification code, which is used to protect the SIM card from unauthorized users. Generally, the PIN code and SIM card will be provided together. After activating the PIN code, you need to input correct password each time you switch the phone on to ensure normal usage.
Caution If you input your PIN code incorrectly for three times in succession, the SIM card will be locked. You need to enter the PUK code to unlock it. (If you don’t have a PUK code, please contact your network operator or SIM card retailer for this information. Please don’t input any characters).
PIN2 code This is the password for activating special functions of the SIM card. You need to input it while entering some functions (eg.Charge Unit, Fixed Dialling etc). Usually, the PIN2 code and the SIM card will be provided together. If you incorrectly input the PIN2 code for three times in succession, it will be locked and you will need to input PUK2 to unlock it.
PUK code This is used to unlock the PIN code. Usually the PUK code and SIM card are provided together. If you don’t have it, please contact with your network operator or SIM card retailer. SIM Card won’t be used any more, if you incorrectly input the PUK code ten times in succession. In that case, please apply a new SIM card from your network operator. PUK code is unmodifiable.
Pagina 25
PUK2 code This is used to unlock the PIN2 code. Usually the PUK2 code and the SIM card are provided together. PUK2 can modify the locked PIN2 code. If you incorrectly input the PUK2 code for ten times in succession, you will not be able to access some functions. Please apply to your operator for a new card. The PUK2 code is unmodifiable. If you lose it, please contact your service provider. CAUTIONS FOR BATTERY CHARGING The phone provides power by using a lithium battery. The standby time and call time will be influenced by the system’s environment and phone settings. v Please use the approved battery and charger designated for this product. The company will take no
responsibility for damage caused by unauthorized battery or charger. v The battery icon will start scrolling when the phone is charged in power-on-state. v
Caution: 1 If there is no battery left at all, then the battery icon will appear after 2-3 minutes of charging. The battery charging time depends on the status of the phone (whether switched on, making a call), usually, it will take about 2-5 hours. 2. To make the new battery achieve its best capacity, please charge and discharge the phone for twice or three times. Please charge the new battery over 10 hours for the first several times.
v Don’t use wet hands to touch the battery or charger while charging in order to avoid danger. v Try not to use the phone while charging. v The battery icon stops scrolling while the battery is full, and then you can disconnect the phone from
the charger adapter. CAUTIONS FOR BATTERY USAGE The battery usage depends on the network, phone setting and usage situation. Take Lithium ion battery of 1500 mill amperes capacity as an example, it allows calling time up to 4-6 hours, three-SIM standby time as 350-500 hours, Dual-SIM standby time as 400-550 hours, and the single-SIM standby time as 450-550 hours. v Never use any damaged battery. v The phone will consume a little power if it is near network station. Therefore, the call and standby time
depends greatly on the signal strength of honeycomb network and the parameters set by network operator.
v The battery charging time lies on the remnant power, and the type of the battery and charger. When the operation time (talk time and standby time) is noticeably shorter than normal, it is time to replace with a new battery.
v Only use batteries and charges authorized for this device, otherwise, explosion might be caused. Please disconnect the charger while unused. Do not leave the battery connected to a charger over one week, for overcharging may shorten the life length.
v Do not connect the anode and cathode of a battery inversely.

Pagina 26
v Do not leave the battery in places with over-high or over-low temperature, otherwise, the battery capacity will be reduced and battery life will be shortened. Always try to keep the battery in room temperature.
v Do not short-circuit the battery. This may damage the electronic core or internal protected circuit. If you keep the unused battery in the pocket or bags, metal objects (eg. coin, clip or pen, etc) inside might have the anode directly contacted with the cathode of the battery and caused accidental short circuit. Therefore, please carefully and separately store the battery.
v Don’t burn your phone battery or treat it as common rubbish. Please adhere to the local environmental policy in order to avoid endangering life and causing environmental damage, and recycle your batteries in time.
v If your phone, battery or other charging device is accidentally penetrated by water, you must not put it inside any calefaction equipment (such as drier, microwave oven etc.) to dry it. The phone or other products may go wrong, and may even cause the phone, battery or other charging device to burn, expand and explode.
v Please deal with the discarded battery according to the relative introduction. The company will take no responsibility for any direct or indirect damage caused by user error.
CAUTIONS FOR SPARE PARTS USAGE v Please put all spare parts (such as SIM card, storage card, battery etc) out of reach of children, in case
danger occurs.
v Please do switch off the phone and unplug the phone and charger before you removing the battery from the phone.
v As the phone’s spare parts are not waterproof, please keep all spare parts dry. v You should pull out the plug of any spare part correctly when you switch off the power, don’t drag the
power line forcibly.
If the phone, battery, and charger don’t operate normally, please contact closest qualified maintenance centres timely. OTHER SAFETY INFORMATION v If you don’t use your phone, it’s better to switch it off and remove the battery so as to save energy and
avoid cellular radiation. v Please don’t have the volume over loud while using the phone, which might impair your hearing. v The unprofessional shouldn’t disassemble the terminal and battery of the phone. v It is recommended that you should try not to use the holster with magnet button, for the magnet may
interfere with the phone signal, and hard iron button may crush the LCD screen. Plastic phone cover will lead to poor volatilization of vapor and have the internal components corrupted, moreover, it can have the phone shell oxidized and faded.
v If you or your family has a medical record of dizziness or epilepsy, please consult with the doctor first, if you want to play phone games or use the flashlight (the flash doesn’t available in all phone models)
v Please don’t put the flashlight too close to the eyes of human beings or animals, as this could do harm to the eyes.
v Should avoid the phone falling off from high places.